
What Is Kefir? How to Make Milk Kefir at Home


Kefir is a fermented milk drink made by bacteria and yeasts working together. It usually has a fresh, slightly sour taste and a smooth, drinkable texture. Depending on the milk, temperature and fermentation time, homemade kefir can also become thick and spoonable.
You can make milk kefir at home in two main ways:
With traditional milk kefir grains
With a freeze-dried kefir starter culture
Both methods make kefir because both use bacteria and yeasts. However, kefir grains and freeze-dried kefir starters are different products. They differ in their physical form, microbial composition, storage life, care and method of reculturing.
This guide explains what kefir is, how starter cultures differ from kefir grains, which milk to choose, the best fermentation temperature and time, how to reculture kefir and how to solve common issues.
What is kefir?
Kefir is fermented milk made with a mixed culture of bacteria and yeasts. At room temperature, it is normally creamy but drinkable. A suitable freeze-dried kefir starter can also make thicker, yogurt-like kefir when used at a warmer temperature.
What Is Kefir?
Milk kefir is made when bacteria and yeasts ferment milk together.
The bacteria use some of the lactose, which is the natural sugar in milk. During this process, they produce lactic acid. This makes the milk more acidic, gives it a pleasantly sour taste and changes its texture.
The yeasts work alongside the bacteria. They contribute to the flavour and aroma of kefir and can produce a small amount of gas. This is why homemade kefir may sometimes have light bubbles or a gentle fizz.
The presence of yeasts is one of the main differences between kefir and traditional yogurt.
Traditional yogurt is made using the bacteria Streptococcus thermophilus and Lactobacillus delbrueckii subsp. bulgaricus. Kefir uses a mixed culture that includes both bacteria and yeasts. This difference is also reflected in the international Codex standard for fermented milk.
Can kefir look like yogurt?
Yes. Appearance alone does not decide whether a fermented milk is yogurt or kefir.
Kefir fermented slowly at room temperature is usually pourable and similar to cultured buttermilk. When a suitable freeze-dried kefir starter is fermented at a warmer temperature, the milk can form a firmer structure and become thick or spoonable.
It may look like yogurt, but it remains kefir because the starter contains kefir bacteria and yeasts. If there is no yeast, then it is not kefir
KEFIR OR YOGURT?
Texture does not define the product.
Thin kefir is still kefir. Thick kefir is also still kefir.
The important difference is the culture. Kefir contains bacteria and yeasts, while traditional yogurt uses its defining bacterial cultures without yeast.
Kefir Starter Culture Versus Kefir Grains
Kefir grains and freeze-dried kefir starters both contain microorganisms that ferment milk.
However, the bacteria and yeasts are carried, stored and transferred in different ways.
What are traditional milk kefir grains?
Milk kefir grains are soft, elastic clusters that usually look like small pieces of cauliflower.
They are not cereal grains, and they do not contain wheat.
The physical body of a kefir grain is made from:
Natural complex sugars produced during fermentation
Milk proteins
Milk fats
Bacteria
Yeasts
These parts together form the kefir grain.
The sugars, proteins and fats are not a separate material surrounding a grain. They form the grain itself, together with the bacteria and yeasts attached to and held within it.
Scientists sometimes use the word matrix to describe this structure. In simple language, the matrix is the physical body of the grain. It is not something separate from the grain.
One of the main natural sugars found in this structure is called kefiran. Milk components and microbial cells collect as the grain develops, creating the soft, elastic cluster that can be seen and handled.
How do kefir grains start a new fermentation?
When kefir grains are placed in fresh milk, the bacteria and yeasts attached to them become active.
They begin using nutrients from the milk and start a new fermentation. After the milk has fermented, the grains are removed and placed into another quantity of fresh milk.
The sugars, proteins and fats that make the grain help hold the microorganisms together. The grain structure also gives the bacteria and yeasts some protection while they are moved between batches.
This protection is useful but limited.
Kefir grains are living cultures. They normally need regular access to fresh milk. If they are left without suitable food for too long, some microorganisms may weaken or die, and the balance of the culture may change.
How long grains remain active depends on:
Storage temperature
The amount and type of milk
How often the milk is changed
Cleanliness
The condition of the grains
Their previous treatment
Kefir grains are therefore well suited to regular, continuous kefir making. They are less convenient when kefir is made only occasionally.
What is a freeze-dried kefir starter?
A freeze-dried kefir starter is a selected mixture of kefir bacteria and yeasts in powder form.
Its main purpose is different from that of fresh kefir grains.
Kefir grains are living structures intended for continuous fermentation. Freeze-dried starters are prepared to make the microorganisms easier to store, transport and activate when needed.
The NPSelection kefir starters contain selected milk-fermenting bacteria together with the yeasts Saccharomyces cerevisiae and Kluyveromyces lactis. It is supplied in sealed sachets, and one sachet is intended for approximately one litre of milk.
A freeze-dried kefir starter:
Does not need to be fed before opening
Is easy to measure
Is easy to transport
Does not need to be strained
Has a defined list of bacteria and yeasts when packed
Can be activated when required
Can be recultured using finished kefir
How a Freeze-Dried Kefir Starter Is Made
The first step is to make kefir under controlled production conditions using the selected bacteria and yeasts.
After fermentation, the culture is concentrated. This places a larger amount of active culture into a smaller volume.
The concentrated culture is then freeze-dried. Freeze-drying removes most of the moisture while helping the microorganisms remain alive.
The dry material is then ground into a fine powder and divided into sachets. It is packed in a protective, low-air environment that limits exposure to oxygen, moisture and outside microorganisms.
The sealed packaging helps to:
Prevent contamination
Keep moisture away from the culture
Reduce exposure to air
Protect the bacteria and yeasts during transport
Extend storage compared with a fresh living culture
Inside the sealed sachet, the microorganisms remain inactive. When the powder is mixed with suitable milk under the correct conditions, they absorb moisture, become active and begin a new fermentation.
Freeze-drying is widely used to preserve starter microorganisms because dry cultures are generally easier to store and transport than fresh cultures. Commercial kefir can be made using freeze-dried starter cultures as well as traditional grains.
SIMPLE DIFFERENCE
Kefir grains keep their bacteria and yeasts inside a living grain made from sugars, proteins, fats and microorganisms. They need fresh milk and regular care.
Freeze-dried starters keep selected bacteria and yeasts in a dry, sealed form. They are made for easier storage, transport and use when required.
Defined Starter Culture Versus Variable Kefir Grains
A newly opened freeze-dried kefir starter has a defined microbial composition.
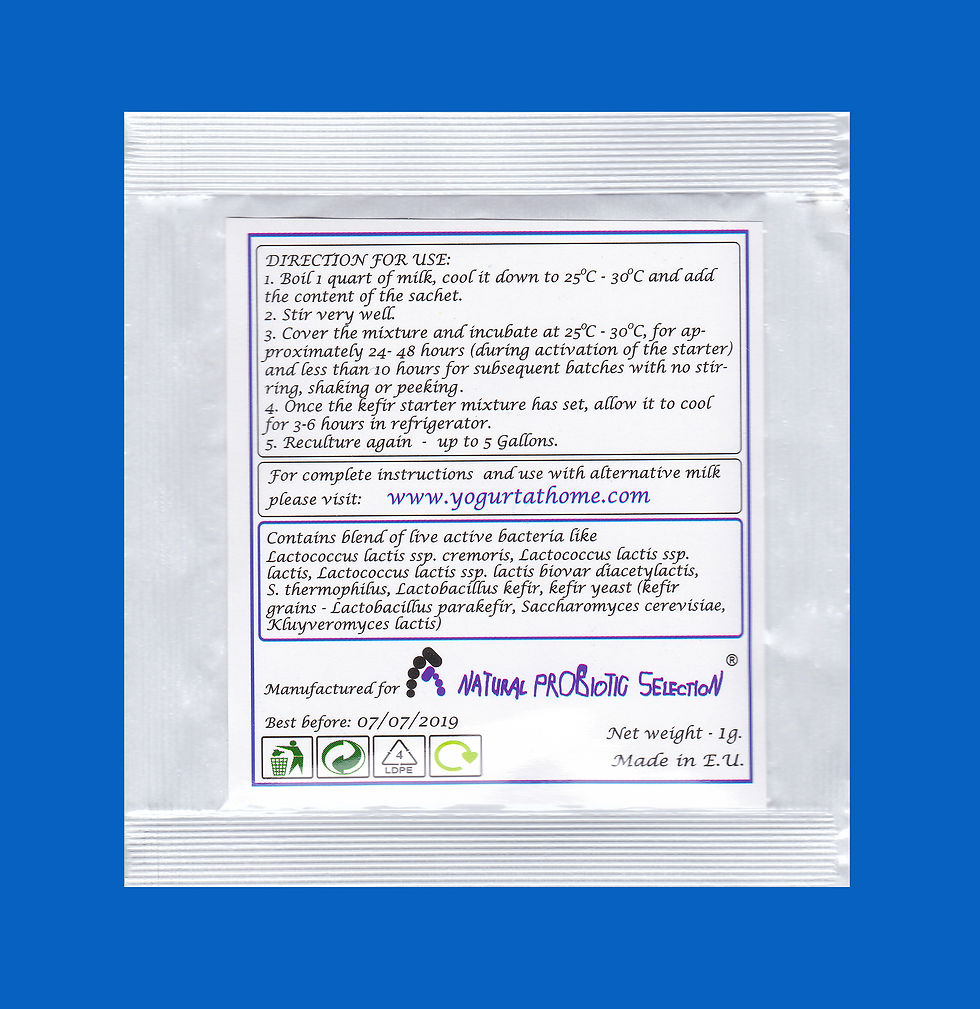
This means that the manufacturer knows which selected species of bacteria and yeasts were included when the starter was produced. The species are shown on the product label.
Traditional kefir grains are naturally more variable.
Their microbial composition can be affected by:
Their geographical origin
The milk used to feed them
Fermentation temperature
Fermentation time
Storage
Handling
Hygiene
Jars, spoons and strainers
Microorganisms from the surrounding environment
Research comparing kefir cultures from different countries has found clear differences in the bacteria and yeasts present. The microbial community can vary according to the origin of the grain, the milk used and the way the culture is maintained.
This does not mean that healthy grains become completely different after every batch. A well-maintained grain community can remain reasonably stable.
However, grains are repeatedly exposed to milk, air, equipment and the home environment. This makes them more open to gradual changes than a newly opened, sealed starter.
A freeze-dried starter gives the user a more controlled starting point. Once it has been recultured repeatedly at home, its balance can also begin to change as it adapts to the milk, temperature and local conditions.
Main differences at a glance
Feature | Freeze-dried kefir starter | Traditional kefir grains |
Starting form | Fine powder | Soft, visible clusters |
Culture | Selected bacteria and yeasts | A naturally variable community |
Composition | Defined when packed | Can differ by origin and handling |
Storage | Designed for easier storage | Needs regular care and fresh milk |
First use | Add the sachet to milk | Add grains to milk |
Straining | Not required | Normally required |
Reculturing | Use finished kefir | Remove and reuse the grains |
Temperature | Room temperature or the approved warm method | Normally room temperature |
Texture | Drinkable or yogurt-like | Usually drinkable, but variable |
Maintenance | Occasional | Regular |
Visible grains | Not in the first recultivations | Already present |
Neither method is automatically better.
Kefir grains may suit someone who wants to make kefir continuously and does not mind feeding, separating and caring for them regularly.
A freeze-dried starter may be better for:
Beginners
Occasional kefir makers
People who travel
People who want easy storage
People who do not want to strain grains
People who want to know which species were included at the start
Suitable Types of Milk for Kefir
Milk is more than the liquid in which kefir is made. It supplies the nutrients used during fermentation and provides the proteins and fats that influence the final texture.
The type and brand of milk can affect:
Fermentation speed
Thickness
Taste
Sourness
Whey separation
The development of grain-like clusters
Whole cow’s milk
Pasteurised whole cow’s milk is normally the easiest choice for homemade milk kefir.
Whole milk contains more fat than semi-skimmed or skimmed milk. The extra fat is not required for fermentation, but it normally creates a creamier and fuller texture.
Choose plain milk without:
Preservatives
Added flavours
Sweeteners
Unnecessary extra ingredients
NPSelection recommends whole dairy milk without preservatives for the most reliable result.
Semi-skimmed and skimmed milk
Semi-skimmed and skimmed milk can also ferment.
The finished kefir will normally be:
Thinner
Less creamy
More drinkable
More likely to show whey
A thin texture does not necessarily mean that the fermentation has failed.
Goat’s milk
Goat’s milk can be used to make kefir, but it often produces a softer and more drinkable result than cow’s milk.
This is mainly because goat’s milk proteins behave differently. A thinner result can still be properly fermented kefir.
Sheep’s and buffalo milk
Sheep’s and buffalo milk contain more milk solids and may produce a rich, thick kefir.
The fermentation time may differ from cow’s milk, so check the taste, smell and texture rather than following only the clock.
Long-life or ultra-high-temperature milk
Long-life milk can normally be fermented.
Some brands make smooth and predictable kefir, while others remain thinner. Milk processing and protein content vary between brands, so a different brand can give a different result even when the same starter is used.
Raw milk
Raw milk contains its own naturally occurring microorganisms.
These microorganisms may compete with, join or change the selected bacteria and yeasts in the starter. This can make the result less predictable.
For the first activation of a freeze-dried sachet, pasteurised milk is generally the more controlled choice.
When using raw milk, understand that its natural microorganisms become another variable in the fermentation. People at higher risk from foodborne illness should follow official food-safety advice before consuming raw milk products.
Lactose-free dairy milk
Some lactose-free dairy milks can ferment, but the result may be different.
In lactose-free milk, the lactose has already been broken down into simpler sugars. This may change:
Sweetness
Fermentation speed
Final taste
Acidity
Plant-based drinks
Plant-based drinks do not have the same protein, fat and sugar structure as dairy milk.
Soy or cashew drinks without preservatives may ferment, but the texture and reculturing ability can be less predictable. The NPSelection product guidance lists soy and cashew drinks without preservatives or additives as possible options.
For the strongest first activation, it is usually better to activate a standard milk kefir starter in dairy milk first. A few spoonfuls of active finished kefir can then be tested with a suitable alternative milk.
MILK MATTERS
When the same starter gives different results in two kitchens, the milk is often the reason.
Before deciding that the starter is weak, try a different brand of plain whole milk without preservatives.

Kefir Fermentation Temperature
Temperature controls how quickly kefir ferments and what texture it develops.
It is important to separate:
Traditional room-temperature kefir
The warmer method used with a freeze-dried starter that is designed for it
Room-temperature fermentation
Traditional kefir is normally fermented at room temperature.
For the NPSelection kefir starter, a temperature of approximately 20°C to 29°C is suitable. The first batch normally needs around 24 to 48 hours, although a cool room may require more time.
At room temperature, fermentation happens more slowly.
The finished kefir is normally:
Creamy but pourable
Similar to cultured buttermilk
Mildly sour
Sometimes lightly fizzy
More suitable for drinking than eating with a spoon
This is a normal kefir result.
Do not wait only for the milk to become as firm as yogurt. A room-temperature batch can be ready while it is still drinkable.
Fermenting a freeze-dried kefir starter at a warmer temperature
The NPSelection freeze-dried kefir starter can also be used with the warmer method described in its instructions.
When fermented in a yogurt maker at approximately 40°C to 43°C, the process is faster. The milk proteins can form a firmer structure, so the finished kefir may become:
Thick
Smooth
Spoonable
Firm
Similar in appearance to yogurt
The first warm batch normally needs around 12 to 16 hours, although the exact time depends on the milk and the appliance.
This does not turn the product into yogurt.
The starter still contains kefir bacteria and yeasts. Its appearance has changed because of the fermentation conditions, not because it has become a different culture.
ROOM TEMPERATURE OR WARM?
Room temperature: slower fermentation and a drinkable texture.
Warmer method: faster fermentation and a thicker, yogurt-like texture.
Both can produce kefir when a suitable kefir starter containing bacteria and yeasts is used.
Do not use the warm method with every culture
The 40°C to 43°C method is specifically for a freeze-dried starter whose instructions permit it.
Traditional live kefir grains are normally used at room temperature. Do not automatically place mature kefir grains in a yogurt maker at this temperature because excessive heat can disturb their microbial balance.
Always follow the instructions for the exact culture being used.
Kefir Fermentation Time
There is no single fermentation time that works in every kitchen.
The time depends on:
Type of starter
Amount of milk
Starting milk temperature
Room temperature
Milk composition
Culture activity
Whether it is the first or a later batch
The desired taste
First batch made from a freeze-dried sachet
Typical times are:
Room temperature: approximately 24 to 48 hours
Approved warm method: approximately 12 to 16 hours
The first batch can be slower because the freeze-dried bacteria and yeasts need time to absorb moisture, become active and adjust to the milk.
Recultured batch
A recultured batch is normally faster because the bacteria and yeasts are already active.
Typical times are:
Warm method: begin checking after approximately 3 hours
Room temperature: commonly around 12 to 24 hours
These times are guides, not guarantees.
Traditional kefir grains
Active traditional kefir grains commonly ferment milk at room temperature within approximately 12 to 24 hours.
The exact time depends on:
The amount of grains
The amount of milk
The temperature
The condition of the grains
How sour you want the kefir
How to know when kefir is ready
Look for several signs together:
The milk smells fresh and pleasantly fermented
It tastes less sweet
Mild sourness has developed
The texture has changed
Light bubbles may be visible
Small pockets of whey may begin to appear
Do not rely on time alone. Kefir is a living fermented food, so each batch can develop at a different speed.
How to Make Milk Kefir at Home with a Freeze-Dried Starter
What you need
One litre of whole dairy milk
One sachet of freeze-dried kefir starter
A clean glass or food-safe container
A clean spoon
A suitable lid or cover
Step 1: Clean the equipment
Wash the container and spoon carefully.
Rinse away any detergent residue, as it may interfere with live cultures.
Step 2: Prepare the milk
Use approximately one litre of whole milk without preservatives.
Follow the instructions supplied with the starter. When heating the milk first, allow it to cool to a lukewarm temperature before adding the culture.
Do not add a starter to very hot milk.
Step 3: Add the starter
Add the complete sachet to the milk.
Stir well to ensure the powder is evenly distributed throughout the milk.
Step 4: Choose the fermentation method
For drinkable kefir:
Leave it at room temperature
Keep it at approximately 20°C to 29°C
Allow around 24 to 48 hours
Check earlier if the room is warm or allow more time if not.
For thicker kefir:
Use the yogurt-maker method
Keep it at approximately 40°C to 43°C
Allow around 12 to 16 hours
Check before the maximum time to avoid excessive sourness
Step 5: Check the kefir
Look for a fresh fermented smell, reduced sweetness, mild acidity and a clear change in texture.
Do not wait only for visible kefir grains. A freeze-dried starter does not need to form visible grains to ferment the milk. In reality, it needs several recultivations until some grains form, as their development starts from microscopic size.
Step 6: Refrigerate
When the desired taste and texture have developed, place the kefir in the refrigerator for approximately three to six hours.
Cooling slows fermentation and allows the texture to settle.
Before adding fruit, honey or other flavours, remove the amount needed for reculturing.
BEGINNER TIP
Do not judge kefir only by thickness.
Room-temperature kefir is often ready while it is still pourable. Its smell, taste and change from fresh milk are also important.
Expected Kefir Taste and Texture
There is no single correct kefir texture.
The finished product depends on the milk, culture, temperature and time.
Room-temperature kefir
Kefir fermented slowly at room temperature is usually:
Smooth
Pourable
Creamy but not firm
Mildly tangy
Similar to cultured buttermilk
Sometimes lightly fizzy
Warm-fermented kefir
A suitable freeze-dried kefir starter fermented at a warmer temperature may produce kefir that is:
Thick
Firm
Spoonable
Smooth
Similar in appearance to yogurt
It is still kefir because the culture contains bacteria and yeasts.
The first batch may taste mild
The first batch made directly from a freeze-dried sachet may have a gentle flavour.
After reculturing, later batches may become:
More sour
More aromatic
Slightly more fizzy
More typical of traditional kefir
This happens because the microorganisms are already active and continue adapting to the milk and fermentation conditions.
What is whey?
Whey is the pale yellow liquid that may separate from the thicker white part of kefir.
A small amount is normal, especially after longer fermentation. Heavy separation usually means that the batch fermented for too long or at too high a temperature.
How to Reculture Milk Kefir
Reculturing means using some finished kefir to start a new batch.
You do not need visible grains to reculture kefir made from a freeze-dried starter.
The bacteria and yeasts are microscopic and are spread throughout the finished kefir. A few spoonfuls can carry the active culture into fresh milk.
Reculturing method
Save approximately one to three tablespoons of plain finished kefir.
Add them to one litre of fresh milk.
Stir using clean equipment.
Ferment at room temperature or use the approved warm method.
Begin checking earlier than you checked the first batch.
Refrigerate when the desired taste and texture are reached.
A recultured batch may be ready in approximately three to six hours when using the warm method.
At room temperature, it may need around 12 to 24 hours.
The NPSelection instructions recommend using one to three tablespoons of finished kefir for the next litre of milk and starting again with a fresh sachet when later batches become weak, thin or watery.If kept clean, this may happen after several months.
Keep the reculturing portion plain
Remove the portion for reculturing before adding:
Fruit
Honey
Sugar
Vanilla
Flavourings
Other ingredients
Extra ingredients can change the fermentation and make the next batch less predictable.
When to start again with a fresh sachet
Use a new sachet when:
Fermentation repeatedly becomes very, very slow
Several batches remain thin
The expected fermented smell disappears
The flavour becomes unpleasant
Every batch separates extremely quickly
Contamination is suspected
NO GRAINS NEEDED
The grains are not the bacteria and yeasts.
Grains are one physical way of carrying them. Finished kefir also contains active bacteria and yeasts, so it can be used to start another batch without visible grains.
How to Encourage Your Own Kefir Grains to Form
A freeze-dried starter does not need to form visible grains to make genuine kefir.
However, small grain-like clusters will appear after several consecutive recultivations. NPSelection practical guidance describes separating these small clusters and continuing to use them in fresh milk so that they can gradually increase in size and number.
Newly formed clusters may also be smaller, softer and less stable than mature traditional kefir grains.
Step 1: Make a successful first batch
Use one freeze-dried sachet with pasteurised whole dairy milk.
Allow the first batch to ferment successfully.
Do not expect visible grains immediately.
Step 2: Use finished kefir for the next batch
Save approximately three tablespoons of plain finished kefir.
Add them to one litre of fresh whole milk.
When the aim is to encourage the same culture to develop, continue reculturing from the finished kefir rather than opening a new sachet for every batch.
Step 3: Make several consecutive batches
Repeat the reculturing process through several batches.
Whole milk may help because it contains more milk solids, including protein and fat, which contribute to the material from which grain-like clusters can develop.
Step 4: Use a moderate room temperature
A room temperature of approximately 20°C to 24°C allows slower fermentation.
This gives the bacteria and yeasts time to grow together without the milk setting too quickly.
Step 5: Avoid heavy over-fermentation
Do not leave the kefir until it has completely separated into firm curds and a large amount of whey.
Heavy separation makes it difficult to distinguish small developing clusters from ordinary milk curds.
Begin checking early, especially when reculturing with already active kefir.
Step 6: Gently shake or swirl the container
When the kefir is ready, gently shake or swirl the jar.
Do not stir aggressively with a spoon.
Very early clusters may be soft and fragile. Strong stirring can break them before they become large enough to recognise.
Step 7: Look for small soft clusters
Early grain-like clusters may be:
Creamy white
Small
Soft
Slightly elastic
Able to remain together when gently lifted
Easy to damage
Ordinary milk curds can look similar.
One lump does not prove that a stable grain has formed. A developing grain should survive transfer and continue helping to ferment fresh milk.
Step 8: Lift the clusters carefully
Use a clean spoon to lift possible clusters.
Do not force very soft clusters through a fine strainer.
It is fine if a little finished kefir is transferred with them.
Place the clusters into a smaller quantity of fresh milk.
Step 9: Continue feeding them
Repeat the process through further batches.
Stable clusters should gradually:
Stay together during transfer
Become easier to handle
Ferment fresh milk
Increase in size or number
Do not expect large cauliflower-shaped grains immediately.
Step 10: Keep a liquid backup
Continue saving a few spoonfuls of finished kefir as a backup.
If the clusters break apart or fail to ferment the next batch, the liquid kefir can still be used for reculturing.
Keep the process clean
Use clean containers, spoons and suitable milk.
Do not deliberately add unknown environmental microorganisms to the kefir. Grain formation should be encouraged through repeated fermentation, gentle handling and suitable milk—not through intentional contamination.
Common Milk Kefir Problems
My first batch is taking too long
A first batch made from a freeze-dried starter may be slow because the microorganisms are becoming active.
Check:
Room temperature
Milk temperature
Quantity of milk
Milk ingredients
Storage condition of the sachet
Cleanliness of the equipment
Detergent residue
Move the container to a slightly warmer place, but do not overheat it.
My kefir is thin
Room-temperature kefir is naturally drinkable.
It may also be thin because:
Low-fat milk was used
The milk has a lower protein content
The room is cool
The batch needs more time
My kefir is thick like yogurt
This can happen when the NPSelection freeze-dried kefir starter is used at the warmer temperature described in its instructions.
It is still kefir because the culture contains bacteria and yeasts.
Gently stir or shake it when you prefer a more drinkable texture.
I cannot see kefir grains
A freeze-dried starter is not supplied as mature visible grains.
Use a few spoonfuls of finished kefir to make the next batch.
Small clusters may appear after repeated reculturing, but visible grains are not required for successful kefir - bacteria nd yeast in its contents are enough for recultivation. Take a few spoons and add to milk. This is enough.
My kefir has separated into curds and whey
The thick white part is curd. The pale yellow liquid is whey.
Separation normally means that fermentation has continued further.
Possible causes include:
Excessive fermentation time
A high temperature
When the smell and colour are normal, gently mix the kefir.
Use a shorter fermentation time for the next batch.
My kefir is too sour
For milder kefir:
Stop fermentation earlier
Use a slightly cooler location
Refrigerate promptly
Do not leave finished kefir at room temperature
Use a starter selected for a mild flavour
My kefir is not sour enough
The first batch can be mild. Our Mild kefir will stay like that if not overfermented.
Allow slightly more time or make another batch using finished kefir. Later batches may become more acidic as the culture becomes fully active; in such a case, reduce the fermentation time.
My kefir is fizzy
A little natural fizz can be produced by kefir yeasts.
More gas may develop when:
Fermentation continues for longer
The room is warm
The container is tightly sealed
The kefir receives a second fermentation
Open sealed containers carefully because pressure can build.
My kefir is stringy, slimy or ropy
An unusual stringy texture may be connected with:
Slow fermentation
Unstable temperature
Milk quality
Changes in the microbial balance
Detergent residue
Unwanted microorganisms
Try a different brand of pasteurised whole milk and use carefully cleaned equipment.
When the problem continues through several batches, start again with a new sachet.
When should kefir be discarded?
Discard the complete batch when you see:
Mould
Pink, orange, green or black growth
A rotten or clearly unpleasant smell
Insects
Dirt or foreign material
Clear signs of contamination
Do not taste suspicious kefir and do not use it to start another batch.
SAFETY FIRST
Natural sourness, whey and light bubbles can be normal.
Mould, unusual colours or a rotten smell are not normal. When in doubt, discard the batch and begin again with clean equipment and a fresh starter.
Kefir Storage Guidance
Storing unopened starter sachets
Keep freeze-dried sachets:
Sealed
Dry
Away from direct sunlight
Away from prolonged direct heat (close to a heat source)
According to the instructions on the package
Freeze-dried starters are more durable than fresh grains because storage and transport are part of their purpose.
They are not indestructible, although very durable. Direct heat, moisture or damaged packaging can reduce their activity.
Use the full sachet after opening. Do not keep a partly opened sachet because moisture and environmental microorganisms may enter it.
Storing traditional kefir grains
Kefir grains need regular fresh milk.
For a short break, they can normally be kept in milk in the refrigerator. Their survival depends on the condition of the grains, the amount of milk and the storage temperature.
After a break, the grains may need one or more fresh batches before they return to normal activity.
The sugars, proteins and fats forming the grains give the microorganisms limited protection, but they do not preserve them indefinitely.
Storing finished kefir
Store finished kefir:
In the refrigerator
In a clean container
With the lid closed
Away from contaminated foods
Away from strong smells
NPSelection’s preparation guidance recommends consuming prepared kefir within approximately 72 hours. The taste may continue becoming more sour during storage because refrigeration slows fermentation but may not stop it immediately.
Storing kefir for reculturing
Save the reculturing portion before adding flavours.
Keep it:
Plain
Refrigerated
In a clean sealed container
For as short a time as practical before the next batch
Frequently Asked Questions About Milk Kefir
Is kefir the same as yogurt?
No.
Traditional yogurt is made using its defining bacterial cultures. Kefir is made with a mixed culture of bacteria and yeasts. Kefir must contain yeast in addition to the bacterial cultures.
Can kefir be thick like yogurt?
Yes.
A suitable freeze-dried kefir starter can make thick, spoonable kefir when fermented at a warmer temperature.
It remains kefir because of the yeast in its contents.
Can I make kefir without grains?
Yes.
A freeze-dried kefir starter can make genuine kefir without mature visible grains.
Do I need grains to reculture kefir?
No.
Use approximately three tablespoons of plain finished kefir with one litre of fresh milk.
Are kefir grains separate from their matrix?
No.
The sugars, proteins, fats, bacteria and yeasts together form the physical kefir grain. The matrix is simply a scientific word for that grain structure.
Which is better: kefir starter or kefir grains?
Neither is automatically better.
A freeze-dried kefir starter is easier to store, transport and measure.
Traditional grains suit people who want to maintain a living culture continuously and are prepared to feed and strain it regularly.
Can a freeze-dried starter produce kefir grains?
Small grain-like clusters may appear after repeated reculturing.
This depends on the milk, temperature, fermentation time and culture activity. With proper care, they will eventually grow larger.
Are newly formed clusters identical to mature traditional grains?
Not necessarily.
Mature grains are complex cultures that have developed through many fermentations. New clusters may initially be smaller, softer and less stable.
What is the best milk for kefir?
Pasteurised whole cow’s milk without preservatives is normally the easiest choice for a creamy and predictable result, as easier to find in the shop.
Is full-fat milk required?
No.
Lower-fat milk can ferment, but whole milk usually produces a creamier texture.
Can I use cold milk?
Cold milk may slow the start of fermentation.
Follow the instructions for your particular culture and avoid adding starter to very hot milk.
How long does milk kefir take?
A first batch normally needs:
Around 24 to 48 hours at room temperature
Around 12 to 16 hours using the approved warm method
Later recultured batches are usually faster.
How do I know when kefir is ready?
Look for:
A fresh fermented smell
Reduced sweetness
Mild acidity
A change in texture
Possible light bubbles
A small amount of whey
Can I add fruit or honey before fermentation?
It is better to ferment plain milk first.
Save the amount needed for reculturing, then add fruit, honey or other flavours to the remaining kefir.
Is whey in kefir normal?
Yes.
A small amount is normal. Heavy separation usually means that the kefir fermented for too long or became too warm.
Why is homemade kefir fizzy?
Kefir yeasts can produce carbon dioxide during fermentation. This can create light natural bubbles.
Do I need a yogurt maker?
No.
Room-temperature kefir can be made in a clean container without special equipment, although this takes more time.
A yogurt maker is optional and should be used only if you wish yogurt-like texture.
Start Making Homemade Milk Kefir
Making milk kefir at home becomes easier once you understand which type of culture you are using.
Traditional kefir grains are living physical structures made from sugars, proteins, fats, bacteria and yeasts. These parts together form the grain. The grain needs regular fresh milk and continuing care.
A freeze-dried kefir starter contains selected bacteria and yeasts in a dry, sealed form. The culture is first grown, then concentrated, frozen, freeze-dried (lyophilised), ground into powder and packed under protective conditions.
This makes the starter easier to store and transport.
At room temperature, milk kefir normally develops slowly and remains creamy but drinkable.
When the NPSelection freeze-dried kefir starter is used at the warmer temperature described in its instructions, the finished kefir may become thick and yogurt-like.
Its appearance does not change its identity.
When kefir bacteria and yeasts ferment the milk together, the result is kefir.


Comments